Tuesday, November 5, 2013

Flaky 2- Crust Pie Shell


It is the season to make pie!
Here we are heading into the true baking season. 
We will all be lusting after that piece of pie that proclaims the season of thankfulness.
Many convenient options are at hand when purchasing ready made pie crust 
but there is something honest and true about making your own pie crust.
It is also extremely inexpensive in comparison to purchasing crust.
 For about $.10 you can make a 2-crust pie shell.
Don't be intimidated.
A good FLAKY pie crust is quite easy!

There are a few cooking utensils that will help your pie crust come along better.
In all truth my mother nor grandmother owned a bread board but it is something that
I find necessary. You will surely need a rolling pin. I have a small collection that I
own just because I have a hang-up for rolling pins but the one I have always used is
the one I purchased  in my teens for a couple of bucks.

As you get started determine what size pie crust you need and if your crust is cooked before 
you filling goes in.


9 inch pie shell
Ingredients:
2 Cups All-purpose flour(sifted)
1 teaspoon salt
2/3 to 3/4 Shortening (if using animal shortening~Lard~use lesser)
                                 (if using vegetable shortening~Crisco~use larger)
1/3 Cup ice water

8 inch pie
Ingredients:
1 1/2 cup All-purpose flour
3/4 teaspoon salt
1/2 Cup shortening
1/4 Cup ice water

Directions:
1. Combine salt & flour
2. Cut-in shortening. You can do this a couple of ways. Some folks use a kitchen utensil to do this but I prefer to use my hands. I believe you will come out with a better result, by hand. Basically, this is a method to combine your flour and your shortening but you don't  really want it mixed or stirred. After adding your shortening you will work it and the flour through you hand until all of your mixture as a close consistency of cornmeal.
3. Add your water. This is where it can be a tad touchy. The suggestion that was given to me was to add your water by the tablespoon but that is extremely tedious, so I pour my water in very slowly while I'm stirring with a fork. It is very possible you will not use all the water humidity will play into this very much.

Your dough is right when it follows your fork around the bowl and will stick together alot like play-do.
Divide in half.
4. Flour your board and your rolling pin.


5. Roll-out dough. Roll in a X. cross-wize...Don't press just roll.
When you have reached about a 5 inch circle flip over and roll. until you get to the size you need.
You can measure using the pie plate. when you have about 2 inches more than your plate you're in good shape.
6. Fold dough in half.
Then half again.
Place in pie plate.
Unfold.

7.  Flute edges. You do whatever you like at this point. I like a fluted edge.
My mama would always press indents with a fork.

8. If your pie crust needs to be already baked you will need to prick it to release air bubbles. This should keep it from rising underneath you crust and making a bubble.  Honestly, I have forgot to do this and it came out fine but best practice is to prick your crust.
Make pricks all the way around the edge and the bottom.

Congratulation!
You've made yourself a pie crust.

Thursday, October 31, 2013

Toasted Pumpkin Seeds


When the carving is done, the fun is not over.
It's time to toast those pumpkin seeds!
Before you throughout you pumpkin pulp
Save those Seeds!

Ingredients:
Pumpkin Seeds(fresh)
2 tablespoon of Oil (olive)
1 tablespoon Sea Salt
1/2 tablespoon chili powder
1/2 tablespoon cumin

Directions:
1. Wash seeds.

2. Dry seeds by patting with paper towels.

3. Coat seeds with oil.
4. Mix sea salt, chili powder, and cumin together.
5. Coat seeds with seasoning mixture.

6. Place an even layer onto baking sheet.

7. Bake at 325 degrees for 15-20 minutes.

             Eat 'em up!


Wednesday, October 30, 2013

What's your cookbook style?

I can't believe I even shared this picture of my recipes.
This is my go to recipes.
They have becoming faded & stained but I've been afraid to change.
You see I may never find an organizational style that will work as well as this one. 
I really did see all of your eyes roll...


When I started the Sookz Nook Blog one of my main goals was to organize and redo my recipes. That's has lead me to looking, looking, and thinking and thinking about what method and style will be best for me. I'm leaning toward a ring style or possibly even a binder with laminate pages. A card system isn't altogether a bad idea but I don't think it's for me. I've thought to have them put into a bound book possibly using Blurb or maybe another photo site such as that. 

So..let me in on what your style is...
Have you gone totally high tech and keep everything on line?
What is your cookbook style?


Monday, October 28, 2013

Mummy Men

This is almost too simple to even post but the kids just loved them.
It really just a new version of the Pig-in-a Blanket
but how cute instead...
Just two ingredients!
Canned biscuits & hot dogs.
Cook about 10 minutes at 350 degrees until golden.

Caramel Candy Apples

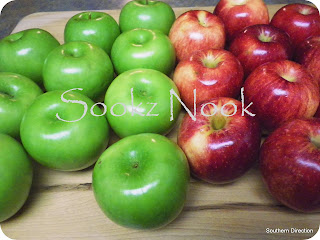
Nothing says Fall Festival more than Caramel Candied Apples.


Ingredients:
20 Apples
2 Bags of Kraft Caramels 
Popsicle Sticks
Fisher's Nut Topping


1.  Start by washing your apples is mild detergent, rinsing and drying. The caramel will not stick if you do not do this first. 
2. Boil watering in a double boiler over low to medium heat. Unwrap caramels, place in top of boiler along with 4 tablespoon of water. Stirring until caramels are melted.
3. Remove candies from the heat.
4. Dip apples one at a time into caramel coating them.
5. Dip apples bottoms into nuts to coat.
6. Refrigerate apples until chilled and caramel is set.

Tips: You can spoon left over caramel over apples before placing them in the refrigerator for more coverage. 
Candies and sprinkles can be added to fancy them up.
Depending on the age of the children eating you could use dowel sticks, branches from trees can make a spookier appearance, or you can even color the tips of your popsicle sticks with a permanent marker.